Installing a Gravel Driveway: Step-by-Step Guide for Long-Lasting Results
Installing a gravel driveway is one of the most cost-effective and durable ways to create a reliable surface for vehicles, trailers, and everyday traffic. With the right preparation, materials, and maintenance, a gravel driveway can last for decades while offering excellent drainage and natural curb appeal. This guide walks you through everything you need to know about installing a gravel driveway from planning to long-term care so you get professional results without costly mistakes.
Why Installing a Gravel Driveway Is a Smart Choice
Many homeowners wonder why installing a gravel driveway makes sense compared to asphalt or concrete. The answer comes down to four key benefits:
Affordability: Gravel is significantly cheaper to purchase and install.
Durability: Properly compacted gravel can handle heavy loads and resist shifting.
Low maintenance: Occasional raking and top-dressing keep the surface fresh.
When you choose gravel, you’re investing in a driveway that adapts to your property’s terrain and climate while staying budget-friendly.
Planning Ahead Before Installing a Gravel Driveway
Preparation is half the job when installing a gravel driveway. Skipping planning steps often leads to uneven surfaces or drainage issues. Here are the essentials:
Measure your space – Determine driveway length and width, then calculate gravel volume using a depth of 8 – 12 inches for vehicle traffic.
Check soil conditions – Clay-heavy soil may require geotextile fabric to prevent mixing with gravel.
Slope and drainage – Plan for a crown (slight rise in the center) or side slope so water runs off instead of pooling.
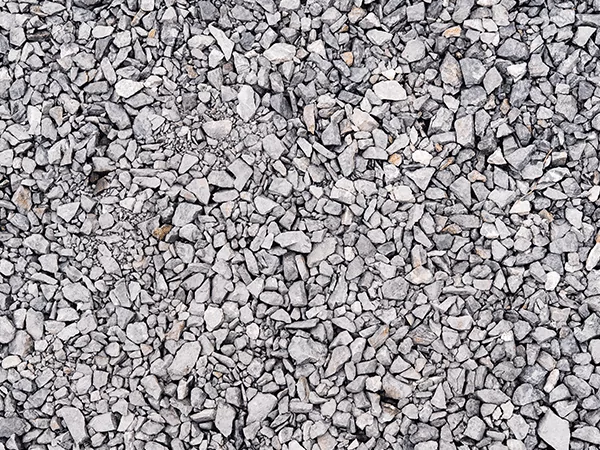
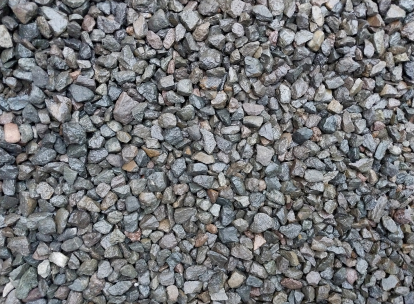
Choose the right gravel sizes – A successful installation usually includes larger base stone (2-3″), mid-layer gravel (1″-1½″), and a top layer of ¾″ crushed gravel for a smooth finish.
By addressing these points, you’re setting yourself up for long-term success when installing a gravel driveway.
Step-by-Step Process for Installing a Gravel Driveway
Step 1: Site Preparation
Clear the area of grass, roots, topsoil, and debris. Dig down 8 – 12 inches, depending on vehicle load. Proper excavation ensures stability and prevents future rutting.
Step 2: Install Geotextile Fabric
While optional, landscape or geotextile fabric is highly recommended when installing a gravel driveway. It separates the soil from gravel, reduces weed growth, and improves load distribution.
Step 3: Lay the Base Layer
Spread 4 – 6 inches of large crushed stone (2 – 3″) and compact thoroughly. This foundation gives the driveway its strength and prevents sinking.
Step 4: Add the Middle Layer
Install 3 – 4 inches of medium-sized gravel (1″ – 1½″). Compact each lift with a plate compactor or roller. This step locks the base and surface layers together.
Step 5: Finish with a Top Layer
Spread 2 – 3 inches of ¾″ driveway gravel. This final layer provides traction, a clean appearance, and smooth driving conditions.
Step 6: Compact and Grade
Compact the entire driveway until firm. Create a crown or side slope (¼″ per foot) for water runoff. Proper grading is one of the most important details when installing a gravel driveway.
Common Mistakes to Avoid When Installing a Gravel Driveway
Even with good materials, a gravel driveway can fail if these mistakes are made:
Insufficient depth – Using less than 8 inches of gravel leads to quick rutting.
Skipping compaction – Uncompacted gravel shifts and washes out.
Flat grading – Without slope, water will pool and damage the driveway.
Wrong gravel type – Rounded stone won’t lock together. Always use angular crushed gravel.
By avoiding these errors, your efforts in installing a gravel driveway will pay off with a surface that lasts.
Long-Term Maintenance Tips After Installing a Gravel Driveway
Once you’re done installing a gravel driveway, proper care keeps it functional and attractive:
Rake regularly – Smooth out ruts and redistribute gravel after storms or heavy traffic.
Control weeds – Pull by hand or use gravel-safe herbicide if needed.
Re-compact seasonally – Especially after winter thaw or heavy rains.
Snow removal care – Lift plow blades slightly to avoid scraping away gravel.
With these habits, your gravel driveway will remain stable and low-maintenance for years.
Cost Considerations for Installing a Gravel Driveway
When budgeting for installing a gravel driveway, factor in:
Material costs – Gravel is typically sold by the ton; larger projects may require truckloads.
Delivery fees – Prices vary depending on distance from quarry.
Equipment rental – Plate compactors or rollers may be needed.
Edging materials – Wood, metal, or stone borders keep gravel contained.
Even with these costs, installing a gravel driveway usually runs one-third the price of asphalt and much less than concrete.
Why Installing a Gravel Driveway Is a Long-Term Investment
Unlike paved surfaces, gravel driveways are easy to refresh. Instead of repaving or sealing, you simply add and compact more gravel. That makes installing a gravel driveway not just affordable upfront but cost-effective over decades. Plus, its natural look blends into rural, suburban, and even modern landscapes.
Frequently Asked Questions
How Long Does It Take to Install a Gravel Driveway?
A standard residential driveway takes one to three days for a crew with proper equipment, and a weekend or two for a DIY project. Excavation is the slowest step, especially in clay or rocky soil. Renting a skid steer instead of digging by hand cuts the timeline roughly in half.
Can I Install a Gravel Driveway Myself?
Yes, provided you can rent a plate compactor and have a way to move material. The physical work is straightforward, but skipping compaction between layers is what separates a driveway that lasts from one that ruts in a season. Order your gravel by the load rather than in bags, since bagged stone gets expensive fast at driveway volumes.
Do I Need a Permit to Install a Gravel Driveway?
It depends on your city or county, particularly where the driveway meets a public road. Some jurisdictions require a curb-cut or stormwater permit even for gravel. Check the local permit rules before excavation starts, not after.
What Is the Best Gravel for the Top Layer of a Driveway?
Angular ¾″ crushed gravel is the standard choice because it locks together and sheds water without rolling underfoot. Avoid rounded stone like pea gravel on the surface, since it migrates into ruts and along the edges. If you want to compare options, look at what makes gravel stay put.
How Often Should a Gravel Driveway Be Regraded?
Plan on regrading once a year in most climates, and twice a year if you get heavy freeze-thaw cycles or plow snow. Regrading redistributes material back to the crown before ruts get deep enough to hold water. Catching it early is far cheaper than rebuilding a washed-out section.
Final Thoughts on Installing a Gravel Driveway
Installing a gravel driveway is a project that combines practicality, affordability, and durability. By preparing the site correctly, using the right gravel layers, compacting thoroughly, and maintaining it seasonally, you’ll enjoy a driveway that handles heavy loads, drains efficiently, and looks great year-round. Whether you’re a DIY homeowner or working with a contractor, this guide ensures you know what it takes to succeed.
Joe Korgenson is Gravel Monkey's materials specialist. He's spent more than twenty years in the aggregate business - running loader crews, dispatching bulk deliveries, and helping homeowners and contractors spec the right stone, gravel, and base material for the job. His guides cover what materials really cost, how much to order, and the installation mistakes that are cheapest to avoid before the truck arrives.